Travel Photography Tips for Stunning Shots
Want to elevate your travel photos from snapshots to stunning art? Travel photography is more than just pointing and shooting; it’s about capturing the essence of a place and its people. This guide will equip you with practical advice to make your travel memories truly unforgettable.
For years, I’ve lugged camera gear across continents, chasing light and stories. I’ve learned that great travel photography isn’t about having the most expensive equipment, but about understanding light, composition, and how to connect with your surroundings. Let’s dive into how you can transform your vacation snaps into something truly special.
Table of Contents
- What’s the Best Travel Photography Gear?
- Mastering Travel Photography Composition Techniques
- Essential Camera Settings for Travel Photography
- Understanding Light: Your Most Important Tool
- Telling Stories Through Your Travel Photography
- Editing Your Travel Photos for Maximum Impact
- Frequently Asked Questions About Travel Photography
What’s the Best Travel Photography Gear?
The question of gear is always buzzing. When I first started, I thought I needed the biggest DSLR with every lens imaginable. That approach led to sore shoulders and missed moments because I was fumbling with equipment. Over my 7 years of dedicated travel photography, I’ve found a sweet spot.
For most people, a mirrorless camera or a high-end compact camera offers the best balance of image quality, portability, and features. Think Fujifilm X-T series, Sony Alpha a6000 series, or even a Google Pixel Pro phone for its incredible computational photography. A versatile zoom lens (like a 24-70mm equivalent) is often sufficient for a wide range of scenes.
Don’t forget extra batteries and memory cards. Nothing kills a shooting day faster than running out of power or space. I always carry at least two extra SD cards and a portable power bank for my phone.
Mastering Travel Photography Composition Techniques
Composition is how you arrange elements within your frame. It’s what guides the viewer’s eye and conveys emotion. Even with a basic camera, strong composition can make a photo pop.
The rule of thirds is a classic for a reason. Imagine your frame divided into nine equal sections by two horizontal and two vertical lines. Placing key elements along these lines or at their intersections often creates a more balanced and engaging image than centering everything.
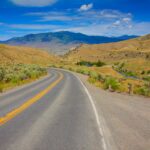
Consider leading lines. These are natural or man-made lines (roads, rivers, fences, pathways) that draw the viewer’s eye into the scene, often towards the main subject. Experiment with different angles. Sometimes, getting low or high can reveal a completely new perspective that makes an ordinary scene extraordinary.
Common Mistake: Many beginners shoot everything from eye level. This often results in a flat, uninspired image. Make it a habit to crouch down, stand on something (safely!), or find an elevated vantage point. I remember shooting a market scene in Marrakech at eye level, and it was just chaotic. When I climbed onto a small stool, I could frame the stalls beautifully with the bustling crowd below.
Essential Camera Settings for Travel Photography
Understanding your camera settings is key to moving beyond auto mode. For travel photography, you’ll often want a balance between capturing detail and managing light.
Aperture Priority Mode (Av or A): This is my go-to for most situations. You set the aperture (f-stop), which controls depth of field (how much is in focus), and the camera chooses the shutter speed. For landscapes where you want everything sharp, use a smaller aperture (higher f-number like f/11 or f/16). For portraits with a blurred background, use a wider aperture (lower f-number like f/2.8 or f/4).
Shutter Speed: This controls how motion is captured. A fast shutter speed (e.g., 1/500 sec) freezes action, while a slow shutter speed (e.g., 1/30 sec or longer) can create motion blur, useful for smoothing water or showing movement.
ISO: This determines your camera’s sensitivity to light. Lower ISO (e.g., 100-400) provides the cleanest image. Increase ISO only when necessary in low light to avoid underexposed photos, but be aware that higher ISOs introduce digital noise (grain).
Understanding Light: Your Most Important Tool
Light is the foundation of photography. The quality, direction, and color of light dramatically impact your images. Learning to see and use light is perhaps the most critical skill in travel photography.
Golden Hour: This refers to the period shortly after sunrise and before sunset. The light is soft, warm, and directional, creating beautiful long shadows and a flattering glow. Many photographers plan their shooting around these times. I once spent two hours waiting for the golden hour to hit a temple in Cambodia; the resulting photos were magical, a stark contrast to the harsh midday sun.
Blue Hour: The brief period just before sunrise and after sunset when the sky takes on a deep blue hue. This is perfect for cityscapes and capturing ambient light.
Hard Light vs. Soft Light: Direct midday sun creates hard light, resulting in strong shadows and high contrast. Overcast days or shaded areas provide soft light, which is more forgiving and flattering for portraits.
Counterintuitive Insight: Don’t be afraid of shooting in harsh midday sun. Instead of fighting it, embrace the strong contrasts. Look for subjects that benefit from dramatic shadows, or use it to create graphic shapes and silhouettes. Sometimes, the most challenging light yields the most unique results.
Telling Stories Through Your Travel Photography
Great travel photography does more than show a place; it tells a story. It evokes emotion and provides context. Think about what message you want your photos to convey.
Capture details: the intricate patterns on a textile, the hands of a craftsman, a local market stall. These small elements add depth and authenticity to your broader landscape or street scenes. I found that focusing on the weathered hands of a fisherman mending his nets in Portugal told a more compelling story than just a wide shot of the harbor.
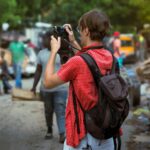
Include people: portraits can be powerful, but even candid shots of people interacting with their environment add life and narrative. Always be respectful and ask permission when possible, especially for close-up portraits. A simple smile and gesture can go a long way.
Show the environment: use wide-angle shots to establish a sense of place. What makes this location unique? Is it the architecture, the natural landscape, the atmosphere?
Statistics: According to a 2023 study by PhotoShelter, 68% of professional photographers cited storytelling as the most important element in their work, emphasizing its role in connecting with an audience.
Consider a series of photos that build a narrative. Perhaps a sequence showing the preparation of a local dish, from market ingredients to the final meal. This approach offers a more comprehensive glimpse into the culture.
Editing Your Travel Photos for Maximum Impact
Editing is the final step in bringing your vision to life. It’s not about altering reality, but about enhancing what you captured.
Software like Adobe Lightroom or Luminar Neo are industry standards. For mobile users, apps like Snapseed or VSCO offer powerful editing tools.
Start with basic adjustments: exposure, contrast, highlights, shadows, whites, and blacks. These sliders help you fine-tune the overall brightness and tonal range of your image. Correcting white balance is also crucial to ensure colors look natural.
Sharpening and noise reduction can improve image clarity. Be subtle with sharpening; over-sharpening creates harsh edges. Noise reduction can clean up images shot at high ISOs, but excessive use can make photos look plasticky.
Color grading can add mood and style. Whether you want a warm, vibrant look or a cool, muted tone, careful color adjustments can significantly impact the feel of your travel photography.
External Authority Link: The U.S. Geological Survey (USGS) provides extensive data on light and atmospheric conditions, which can be indirectly useful for understanding optimal shooting times and conditions in different geographical locations.
List Example: Post-Processing Workflow Checklist
- Import and backup RAW files.
- Cull (select) the best images.
- Adjust exposure and contrast.
- Correct white balance.
- Tweak highlights and shadows.
- Apply sharpening and noise reduction.
- Adjust color saturation and vibrance.
- Crop and straighten if needed.
- Export in desired format (JPEG for web, TIFF for print).
Remember, editing is subjective. Develop a style that suits your vision and the story you want to tell. The goal is to make your travel photography look its best, not to create something fake.
Frequently Asked Questions About Travel Photography
What is the best camera for travel photography?
The best camera for travel photography balances image quality, size, and weight. Mirrorless cameras like the Fujifilm X-T series or Sony Alpha models offer excellent performance in a compact body. High-end smartphones are also incredibly capable for casual travel photography.
Should I use a tripod for travel photography?
A tripod is often unnecessary for general travel photography due to its bulk. However, it’s essential for low-light situations, long exposures (like waterfalls or starry skies), and precise landscape shots. Consider a lightweight travel tripod if you anticipate needing one.
How do I make my travel photos stand out?
To make your travel photos stand out, focus on strong composition, unique perspectives, capturing genuine moments, and telling a story. Master the use of light and develop a consistent editing style that enhances your images without overdoing it.
What are essential travel photography accessories?
Essential accessories include extra batteries, memory cards, a comfortable camera strap, a lens cleaning cloth, and a portable power bank. A small, durable camera bag or backpack is also crucial for protecting your gear and keeping it accessible.
How can I improve my travel photography skills quickly?
Improve your travel photography skills by practicing consistently, studying the work of photographers you admire, learning basic camera settings and composition rules, and actively seeking feedback. Experimenting with different lighting and perspectives is key to rapid growth.
By implementing these tips, you’ll be well on your way to capturing more compelling and memorable images on your next adventure. Happy shooting!