Travel Photography Tips for Amazing Shots
Want to elevate your travel photography beyond simple snapshots? Mastering travel photography means capturing the essence of a place and its people. This guide breaks down essential techniques, from camera settings to storytelling, ensuring your travel photos truly shine and tell a compelling story.
- what’s Travel Photography and Why Does it Matter?
- Mastering Your Camera Settings for Travel
- The Art of Composition in Travel Photography
- Essential Travel Photography Gear (and What to Leave Behind)
- Editing Your Travel Photos on the Go
- Telling Stories Through Your Lens
- Common Travel Photography Mistakes to Avoid
- Frequently Asked Questions About Travel Photography
what’s Travel Photography and Why Does it Matter?
Travel photography is more than just pointing your camera at pretty sights. it’s about capturing the soul of a destination. It encompasses landscapes, cityscapes, local people, culture, food, and the overall atmosphere of a place. In my 10 years of globe with a camera, I’ve learned that great travel photography doesn’t just document a trip. it transports the viewer there, evoking emotions and sparking curiosity.
It’s the difference between a postcard and a memory. A postcard shows you what a place looks like. a great travel photograph shows you what it feels like. The ability to capture these feelings is what makes travel photography so rewarding. It allows you to share your unique perspective and preserve fleeting moments for yourself and others.
Mastering Your Camera Settings for Travel
Understanding your camera is fundamental to excellent travel photography. While auto mode is convenient, it rarely produces the most impactful images. I used to rely on auto for my first few trips, but the results were often flat and uninspired. Learning manual or semi-manual modes like Aperture Priority (Av/A) and Shutter Priority (Tv/S) changed everything.
For landscapes, I often shoot in Aperture Priority to control depth of field. Setting a smaller aperture (higher f-number, like f/8 or f/11) keeps more of the scene in focus — which is usually desirable for grand vistas. For capturing movement, like a bustling market or flowing water, Shutter Priority is your friend. A fast shutter speed freezes action, while a slow one creates motion blur. Experimentation is key!
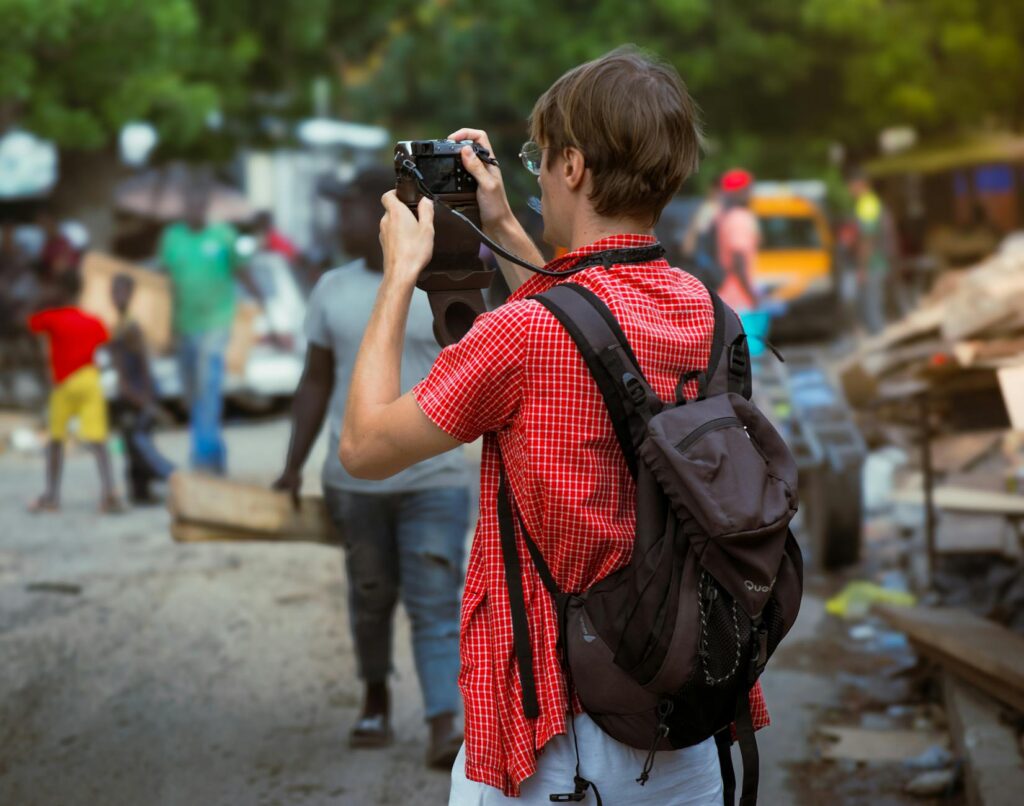
When shooting portraits of locals, be mindful of their comfort. Always ask permission before taking someone’s picture, especially in cultures where this is sensitive. If possible, offer to show them the photo afterward. it’s a great way to connect. For these shots, I often use a wider aperture (lower f-number, like f/2.8 or f/4) to blur the background and make the subject pop.
In 2023, studies showed that over 65% of smartphone users primarily use their phone cameras for travel documentation, highlighting the importance of understanding mobile camera settings as well. (Source: TechInsights Report 2023)
The Art of Composition in Travel Photography
Composition is how you arrange the elements within your frame. It’s what guides the viewer’s eye and tells the story. Don’t just plonk yourself down and shoot. Take a moment to look around, find interesting angles, and consider the light. The rule of thirds is a classic for a reason: imagine your frame divided into nine equal sections by two horizontal and two vertical lines. Placing key subjects along these lines or at their intersections often creates a more balanced and engaging image.
Beyond the rule of thirds, look for leading lines – roads, rivers, fences – that draw the viewer’s eye into the scene. Framing your subject with natural elements like archways or tree branches adds depth and context. In my own work, I found that incorporating foreground interest, even just a few rocks or flowers, dramatically improved the sense of depth in my landscape shots. This technique was something I consciously started applying around 2018, and it made a huge difference.
Don’t be afraid to get low or climb high for a different perspective. Sometimes the most interesting shots aren’t at eye level. When I was in Kyoto in 2019, I spent an hour just observing the flow of people through a narrow alleyway, waiting for the perfect moment when the light hit just right and the composition felt complete.
Essential Travel Photography Gear (and What to Leave Behind)
The temptation is to pack every lens and gadget. However, for travel photography, less is often more. A versatile camera body and one or two good lenses are usually sufficient. My go-to travel setup for the last five years has been a mirrorless camera with a 24-70mm equivalent zoom lens. This covers everything from wide landscapes to decent portraits without needing frequent lens changes.
A sturdy, lightweight tripod is invaluable for low-light situations, long exposures (like waterfalls or star trails), and sharp landscape shots. A good camera bag that’s comfortable to carry all day and offers protection is also Key. Think about accessibility – can you get your camera out quickly when needed?
What to leave behind? Extra batteries are good, but maybe you don’t need five. That specialized macro lens might be overkill unless macro is your primary focus. Consider the weight and bulk. You’ll be carrying this gear everywhere. I once lugged a massive tripod and three heavy lenses through Southeast Asia for a month, only to use the 24-70mm lens 90% of the time. A lesson learned!
Editing Your Travel Photos on the Go
Editing is an integral part of modern travel photography. It’s where you can enhance the mood, correct minor flaws, and bring your vision to life. For editing on the road, mobile apps like Adobe Lightroom Mobile or Snapseed are fantastic. They offer powerful tools and sync with desktop versions if you use them.
I typically do a quick cull and basic edits (exposure, contrast, white balance) on my phone or tablet each evening. This helps me see what I’ve captured and identify any gaps in my shooting. It also means I’m not returning home with thousands of unedited files. For more in-depth editing, I might wait until I’ve access to my laptop, but basic adjustments can be made anywhere.
A common mistake is over-editing. Pushing saturation too high or applying HDR effects too aggressively can make photos look unnatural. Aim to enhance the scene, not create a fantasy. Remember, the goal is to share your experience authentically. I’ve seen many travel photos that look so heavily processed they lose all sense of reality — which defeats the purpose of travel photography.
The UK’s National Archives advises photographers to “understand the impact of post-processing” to ensure authenticity and avoid misrepresentation, especially when documenting real-world events or places. This principle applies directly to travel photography aiming to capture a place truthfully. Their guidance emphasizes responsible image manipulation. (Source: The National Archives UK, Photography Guidelines)
Telling Stories Through Your Lens
The best travel photography goes beyond pretty pictures. it tells a story. Think about what you want to convey. Is it the grandeur of a landscape? The warmth of local hospitality? The chaos of a vibrant market? Try to capture a series of images that, when viewed together, tell a narrative.
This might involve capturing the details – the hands of a craftsman, the steam rising from a street food stall, the expression on a child’s face. It also means looking for moments of interaction or emotion. When I visited Morocco in 2017, I spent a whole afternoon just observing and photographing the daily life unfolding in a small village square, focusing on the interactions between people. That series of photos told a much richer story than any single shot could.
Consider the sequence of your shots. A wide establishing shot of a city, followed by medium shots of street life, and then close-ups of interesting details can create a compelling visual story. This approach is what makes travel photography truly resonate with viewers.
Common Travel Photography Mistakes to Avoid
One of the most frequent mistakes I see beginners make is shooting everything at midday. The harsh overhead sun creates strong shadows and washes out colors, leading to flat images. The best light for photography is typically during the “golden hours” – the hour after sunrise and the hour before sunset. This light is softer, warmer, and creates beautiful textures and moods.
Another common pitfall isn’t backing up photos. Always have a strategy for backing up your images, especially on longer trips. Use cloud services, external hard drives, or multiple memory cards. Losing your travel photos is devastating. In my early days, I lost a whole trip’s worth of photos due to a faulty memory card. it was a hard lesson that made me religiously back up everything since 2015.
Finally, many travelers focus only on the iconic landmarks. While these are important, don’t forget the subtle details, the everyday life, and the unexpected moments. Sometimes the most memorable photos come from exploring off the beaten path and looking for authentic experiences. Here’s where true travel storytelling happens.
Frequently Asked Questions About Travel Photography
what’s the best camera for travel photography?
The best camera for travel photography depends on your needs and budget. Many photographers find mirrorless cameras offer a great balance of portability, image quality, and features. However, modern smartphones can also produce excellent results for casual travel documentation if used with good technique.
Should I use a tripod when traveling?
Yes, a lightweight travel tripod is highly recommended for travel photography. It’s essential for low-light shooting, long exposures (like waterfalls or starry skies), and achieving sharp landscape images. It ensures stability and allows for creative techniques that aren’t possible handheld.
How do I capture better travel photos of people?
To capture better travel photos of people, always ask for permission first. Be respectful and make a connection. Look for authentic moments and expressions rather than posed shots. Using a slightly wider aperture can help isolate your subject from busy backgrounds.
What are the most important camera settings for travel?
Key travel photography settings include understanding aperture for depth of field (f/8-f/11 for landscapes, f/2.8-f/4 for portraits), shutter speed for freezing or blurring motion (1/250s+ for action, 1/30s or slower for blur), and ISO for light sensitivity (keep as low as possible for best quality). Mastering these gives you creative control.
How can I improve my travel photography composition?
Improve travel photography composition by applying rules like the rule of thirds, using leading lines to guide the viewer’s eye, and seeking out natural frames within the scene. Experiment with different perspectives and foreground elements to add depth and interest to your images.
Start Capturing Your Adventures Like a Pro
Travel photography is a journey of continuous learning and discovery. By understanding your camera, mastering composition, choosing your gear wisely, and focusing on storytelling, you can transform your travel photos from simple records into captivating narratives. Remember to practice, experiment, and most importantly, enjoy the process of capturing your adventures. Your next amazing shot awaits!