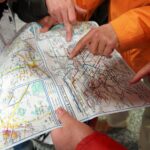
Master Travel Photography with Expert Tips for Stunning Photos
Want to elevate your travel photos from simple snapshots to stunning works of art? Travel photography is more than just pointing and shooting; it’s about capturing the essence of a place, its culture, and its people. This comprehensive guide is designed to equip you with practical, up-to-date advice to make your travel memories truly unforgettable, transforming your vacation snaps into something truly special.
Latest Update (April 2026)
As of April 2026, the landscape of travel photography continues to evolve. Advances in smartphone computational photography, as reported by Esquire, mean that high-quality images are more accessible than ever. Furthermore, the ongoing digital transformation, a trend highlighted by Outlook Traveller in late 2025, emphasizes the importance of understanding post-processing and digital workflows. This update incorporates these developments, alongside expert recommendations for gear, composition, and capturing light, ensuring your photography skills are current for 2026.
Table of Contents
- What’s the Best Travel Photography Gear in 2026?
- Mastering Travel Photography Composition Techniques
- Essential Camera Settings for Travel Photography
- Understanding Light: Your Most Important Tool
- Telling Stories Through Your Travel Photography
- Editing Your Travel Photos for Maximum Impact
- Frequently Asked Questions About Travel Photography
What’s the Best Travel Photography Gear in 2026?
The question of optimal gear is a frequent topic of discussion. While early enthusiasts might have believed that only the most advanced DSLR cameras with an array of lenses would suffice, this approach often proved cumbersome, leading to missed opportunities due to equipment weight and complexity. Over years of dedicated travel photography, a balance has been struck between capability and portability.
For many travelers in 2026, mirrorless cameras or high-end compact cameras offer an excellent blend of image quality, portability, and advanced features. Brands like Fujifilm (e.g., X-T series), Sony (e.g., Alpha a6000 series), and even premium smartphone lines like the Google Pixel Pro are frequently recommended for their impressive image quality and computational photography capabilities, as noted in recent reviews. A versatile zoom lens, often covering a range equivalent to 24-70mm, is typically sufficient for a wide array of photographic scenarios. Amateur Photographer also recently provided guidance emphasizing that tips are applicable regardless of location or subject, suggesting that adaptability with your chosen gear is key.
Don’t overlook the essentials: extra batteries and memory cards are vital. Running out of power or storage can halt your shooting day prematurely. It is wise to carry at least two spare SD cards and a reliable portable power bank for your mobile devices.
Mastering Travel Photography Composition Techniques
Composition is fundamental to creating compelling images; it’s the artful arrangement of elements within your frame that guides the viewer’s eye and evokes emotion. Even with basic equipment, strong composition can dramatically enhance a photograph’s impact.
The rule of thirds remains a cornerstone of good composition. Visualize your frame divided into nine equal segments by two horizontal and two vertical lines. Placing your main subjects or points of interest along these lines or at their intersections typically results in a more balanced and engaging image than simply centering the subject.
Leading lines are another powerful technique. These can be natural (rivers, roads, pathways) or man-made (fences, architectural lines) elements that naturally guide the viewer’s gaze deeper into the scene, often towards the primary focal point. Experimentation with different vantage points is also key. Sometimes, adopting a low or high perspective can reveal a unique and captivating view of an otherwise ordinary scene.
A common oversight among beginners is shooting exclusively from eye level, which can lead to flat, uninspired images. Make it a conscious effort to vary your perspective: crouch down, find a safe elevated position, or frame your subject from an unusual angle. This practice can transform mundane scenes into visually dynamic photographs.
Essential Camera Settings for Travel Photography
Moving beyond automatic modes is essential for unlocking your camera’s full potential. For travel photography, striking a balance between capturing fine detail and effectively managing diverse lighting conditions is paramount.
Aperture Priority Mode (Av or A)
This mode is highly recommended for many travel scenarios. You control the aperture (f-stop), which dictates the depth of field (the range of sharpness in your image), while the camera automatically selects the appropriate shutter speed. For expansive landscapes where you desire everything from foreground to background to be in sharp focus, opt for a smaller aperture (a higher f-number, such as f/11 or f/16). Conversely, for portraits where you want to isolate your subject with a softly blurred background, use a wider aperture (a lower f-number, like f/2.8 or f/4).
Shutter Speed
Shutter speed determines how motion is rendered in your photograph. A fast shutter speed (e.g., 1/500 second or quicker) is effective for freezing action, ideal for capturing sports or wildlife. A slower shutter speed (e.g., 1/30 second or longer) can introduce intentional motion blur, which is useful for depicting the smooth flow of water, creating light trails at night, or conveying a sense of movement.
ISO
ISO controls your camera sensor’s sensitivity to light. A lower ISO setting (typically ISO 100-400) yields the cleanest images with minimal digital noise. Increase the ISO only when absolutely necessary in low-light conditions to achieve a proper exposure, but be mindful that higher ISO values introduce digital noise, which can degrade image quality.
Important: Whenever possible, shoot in RAW format. RAW files capture significantly more image data than JPEGs, offering substantially greater flexibility during post-processing. This allows for more effective adjustments to exposure, white balance, and color correction, acting as a crucial safety net for your images.
Understanding Light: Your Most Important Tool
Light is the fundamental element of photography. Its quality, direction, and color profoundly influence the mood and impact of your images. Learning to observe and use light effectively is arguably the most critical skill for any travel photographer.
Golden Hour
This refers to the period shortly after sunrise and the time just before sunset. During these times, the sun is low on the horizon, casting a soft, warm, and directional light that creates beautiful long shadows and a flattering glow on subjects. Many photographers strategically plan their shooting schedules around these periods to maximize the visual appeal of their scenes.
Blue Hour
The brief twilight period just before sunrise and after sunset, when the sky exhibits a deep, rich blue hue, is known as the blue hour. This time is particularly well-suited for capturing cityscapes and architectural subjects, as it allows for the incorporation of artificial lights and ambient city glow against a darkening sky.
Hard Light vs. Soft Light
Direct midday sun produces hard light, characterized by high contrast and distinct, often harsh shadows. Conversely, overcast skies or shooting in shaded areas provide soft light, which is more forgiving and generally more flattering for portraits and detailed scenes, minimizing distracting shadows.
Counterintuitive Insight: Do not shy away from shooting in challenging light conditions. While golden hour is ideal, even harsh midday sun can be used creatively. Look for strong graphic shapes, use shadows as compositional elements, or seek out shade for portraiture. As noted by BBC’s aurora chaser’s guide, understanding different light phenomena, like the aurora, is key to capturing unique natural events.
Telling Stories Through Your Travel Photography
Great travel photography goes beyond documenting a location; it tells a story. Consider what narrative you want to convey about the place and its inhabitants. This involves looking for moments of human interaction, capturing details that evoke a sense of place, and understanding the cultural context.
Focus on People: When photographing people, always seek permission if possible, especially for close-up portraits. Candid shots can be powerful, but respectful engagement often yields more authentic and meaningful images. Observe daily life, local markets, and traditional crafts. As Jupiter Magazine’s coverage of master classes suggests, there’s an art to capturing the essence of a subject, whether it’s a person or a place.
Capture Details: Look for elements that define a culture or environment: textures, patterns, local cuisine, signage, transportation, or architectural details. These elements add depth and context to your broader scene shots.
Show Scale and Context: Combine wide shots that establish the environment with tighter shots that highlight specific details or interactions. This provides a comprehensive view of the place and its atmosphere.
Editing Your Travel Photos for Maximum Impact
Post-processing is an integral part of modern photography. Editing allows you to refine your images, correct minor flaws, and enhance the mood and impact of your shots. Software like Adobe Lightroom, Capture One, or even mobile apps like Snapseed and VSCO offer powerful tools.
Basic Adjustments: Start with fundamental adjustments: exposure, contrast, highlights, shadows, whites, and blacks. These controls help to balance the tonal range of your image. White balance correction is also critical for accurate color representation.
Color and Saturation: Use these tools judiciously to enhance the vibrancy of your scene without making it look unnatural. Sometimes, a subtle boost can bring out the best in a landscape or market scene.
Sharpening and Noise Reduction: Apply sharpening carefully to bring out detail, particularly in landscapes. If you shot at a higher ISO, noise reduction can help to smooth out graininess, but use it sparingly to avoid a plasticky look.
Cropping and Straightening: Use cropping to improve composition by removing distracting elements or to recompose the shot. Ensure your horizons are straight, especially in landscape photography.
Consistency: Develop a consistent editing style for a series of photos from the same trip. This creates a cohesive visual narrative. Remember, the goal is to enhance, not to misrepresent.
Frequently Asked Questions About Travel Photography
What is the single most important piece of gear for travel photography?
While opinions vary, many experts suggest that a comfortable, reliable camera strap is invaluable. It ensures your camera is always accessible, reducing missed shots. Beyond that, a versatile lens that covers common focal lengths (like a 24-70mm equivalent) is highly practical for most travel situations.
How can I improve my travel photos without buying new equipment?
Focus on mastering composition techniques like the rule of thirds and leading lines. Pay close attention to light, especially during golden hour. Practice shooting from different angles and learn to tell a story by observing people and details. Effective editing can also significantly elevate your existing images.
Is it better to shoot travel photos in RAW or JPEG?
For maximum flexibility in editing, shooting in RAW format is strongly recommended if your camera supports it. RAW files contain more data, allowing for greater adjustments to exposure, white balance, and color correction without significant loss of quality compared to JPEGs.
How do I deal with harsh midday sun in my travel photos?
While not ideal, harsh midday sun can be managed. Seek out shade for portraits, use it to create strong graphic shapes and dramatic shadows in architectural or abstract shots, or use a polarizing filter to reduce glare and deepen colors. Post-processing can also help recover shadow detail.
What are the ethical considerations when photographing people while traveling?
It’s crucial to be respectful. Whenever possible, ask for permission before taking close-up portraits. Be mindful of cultural sensitivities and avoid photographing people in vulnerable situations. Observing and capturing candid moments respectfully is often appreciated, but direct engagement and permission are always best practice.
Conclusion
Mastering travel photography in 2026 is an achievable goal for anyone with a passion for exploration and a willingness to learn. By understanding your gear, applying strong compositional principles, mastering camera settings, utilizing light effectively, and refining your images through editing, you can transform your travel experiences into a stunning visual narrative. Remember that the best travel photos often come from patience, observation, and a genuine connection with the places and people you encounter.